Introduction
Shoulder seams connect the front and back sections of a garment and help maintain its shape around the upper body. In knit T-shirts, lightweight tops, and some stretch garments, the shoulder area can be vulnerable to stretching or distortion.
If the seam grows during sewing or repeated wear, the garment may appear wider at the shoulders or develop an uneven neckline. If the reinforcement is too rigid, the seam may feel stiff or interfere with the fabric’s natural movement.
For custom apparel buyers, shoulder seam stabilization should be selected according to the garment’s material, construction, and intended use.
1. Identify Whether Stabilization Is Needed
Not every garment requires the same reinforcement method.
A stable woven shirt may behave differently from a lightweight jersey T-shirt or a highly elastic sports top.
Before selecting a method, buyers should confirm the fabric’s stretch characteristics, the direction of the shoulder seam, and the garment’s expected use.
Useful questions include:
- Does the shoulder fabric stretch easily?
- Is the seam likely to carry repeated pulling forces?
- Does the garment require significant flexibility?
- Is the shoulder area expected to retain a very precise shape?
- Will the garment undergo frequent washing or intensive use?
These factors help determine whether reinforcement is needed and which options should be tested.
2. Choose a Compatible Stabilization Material
Possible stabilization methods include suitable elastic materials, lightweight interfacing, self-fabric strips, or other constructions appropriate to the garment.
The choice should not be based on the assumption that a stronger or stiffer reinforcement is always better.
For stretchy knitwear, a rigid tape may restrict the fabric’s movement or create an uncomfortable seam. Conversely, a material that is too flexible may not provide enough control for a fabric that stretches easily during sewing.
Buyers should request a recommendation based on the actual material and review the result on a sample.
3. Confirm the Reinforcement Location
The placement of reinforcement affects how the shoulder seam behaves.
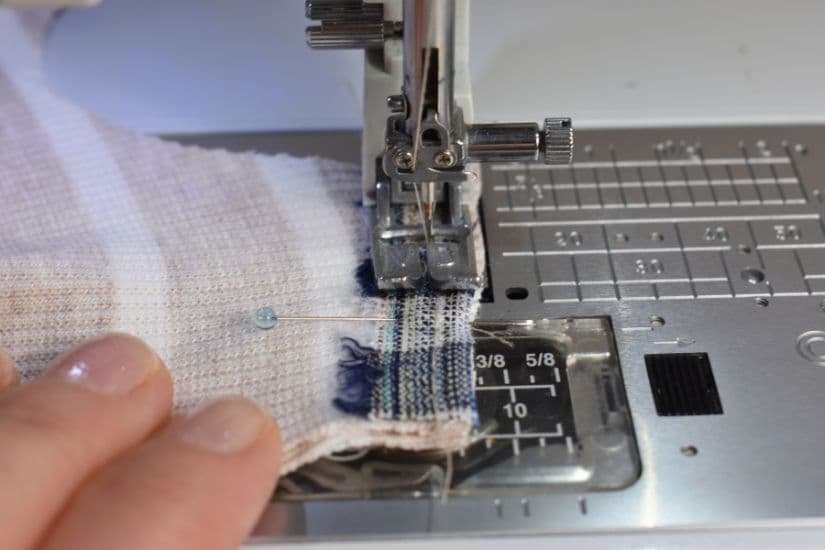
Depending on the construction, the stabilizing material may be positioned along a seam allowance or integrated into the seam during sewing.
The specification should identify the intended location and clarify whether the reinforcement should remain hidden inside the garment.
This is especially important for lightweight fabrics, where a thick strip or an incorrectly positioned reinforcement may create visible ridges or show through the fabric.
A sample should be inspected from both the outside and the inside.
4. Avoid Excessive Bulk
Shoulder seams may meet other construction details, including the neckline, sleeve seam, or collar area.
If reinforcement is too wide or thick, these intersections may become bulky and difficult to finish cleanly.
Buyers should inspect the shoulder area for:
- Visible ridges
- Uneven seam allowances
- Excessive thickness
- Distortion near the neckline
- Uncomfortable contact with the skin
- Differences between the left and right shoulders
The goal is to provide sufficient stability without making the seam unnecessarily stiff.
5. Check the Seam During Movement
A garment that looks correct on a flat table may feel different when worn.
During sample approval, the wearer should raise the arms, reach forward, and move the shoulders naturally.
Check whether the seam restricts movement, pulls the neckline, or creates tension across the upper body.
For performance apparel, the evaluation should reflect the garment’s intended activity. A casual T-shirt and a close-fitting training top may have different requirements.
6. Inspect the Sewing Quality
Stabilization material cannot compensate for poor seam construction.
Buyers should still inspect the shoulder seam for skipped stitches, uneven seam allowances, puckering, loose threads, and inconsistent joining.
If the reinforcement is intended to be caught in the seam, confirm that it is positioned consistently and secured as specified.
The finished garment should maintain a clean shoulder line without unnecessary stretching or gathering.
7. Test After Washing and Repeated Wear
Shoulder seams may change after laundering, particularly when the body fabric and reinforcement respond differently to heat, moisture, or mechanical action.
Before approving bulk production, check the sample after the intended care process.
Look for:
- Seam growth or distortion
- Puckering along the shoulder
- Changes in neckline shape
- Stiffness or discomfort
- Visible reinforcement lines
- Differences between the two shoulders
If the product is designed for frequent use, repeated wear and movement should also be considered during evaluation.
8. What Should Be Included in the Tech Pack?
A shoulder seam specification should include:
- Main fabric composition and stretch characteristics
- Required stabilization method, if specified
- Reinforcement material and width
- Reinforcement location
- Seam construction details
- Acceptable appearance and comfort criteria
- Relevant sample test conditions
- Approved sample reference
If the manufacturer recommends a different reinforcement method during development, the buyer should review and approve the change before bulk production.
Our Approach to Custom Apparel
For custom knitwear and stretch garments, shoulder seam stabilization should be evaluated with the actual fabric and finished garment. Approving the reinforcement method, seam appearance, and comfort together helps prevent unwanted stretching without creating a rigid or bulky shoulder area.
Conclusion
Shoulder seam stabilization can help maintain garment shape, but the correct method depends on the fabric and construction.
Before approving a bulk order, buyers should check the reinforcement material, inspect the seam from both sides, test movement, and review the garment after washing.