
Introduction
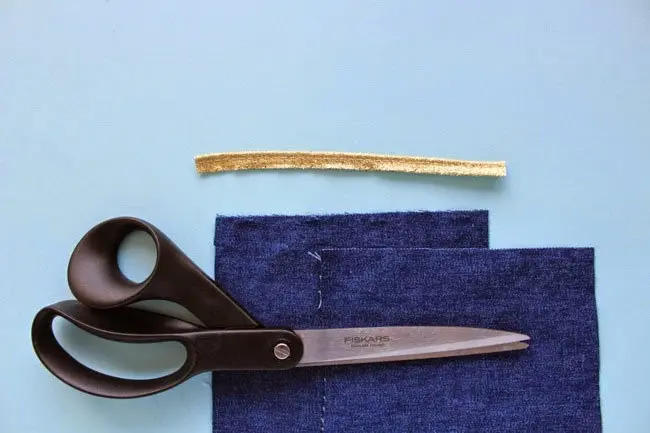
Piping is a narrow strip of material, often folded around a cord or formed into a defined edge, that is inserted into a garment seam. It can create a subtle outline or a strong contrast between adjoining panels.
This detail is often used on sportswear, tracksuits, jackets, uniforms, and fashion garments. Although piping can make a design look more distinctive, poorly specified piping may cause bulky seams, uneven lines, uncomfortable edges, or inconsistent appearance.
1. Define the Intended Piping Style
Before production, buyers should clarify what kind of piping the design requires.
Some piping uses a cord inside a fabric covering to create a raised edge. Other designs use a flat or narrow strip to create a contrasting line.
The specification should explain whether the piping is intended to be decorative, structural, or both.
Useful details include:
- Piping width or finished visible thickness
- Whether the piping contains a cord
- Base material and covering material
- Color and surface finish
- Whether the piping should appear raised or flat
- Reference images showing the intended result
A photograph alone may not communicate the required thickness accurately, so measurements should accompany the visual reference.
2. Confirm Color and Contrast
Piping often sits between two larger fabric panels, making even small color differences noticeable.
For example, white piping on a dark jacket may create a strong visual outline, while tone-on-tone piping may provide a more subtle effect.
Buyers should confirm whether the piping color must match a specific body fabric, trim color, or brand color reference.
If the piping material differs from the main garment fabric, its appearance may change under different lighting. Requesting a physical sample can help prevent unexpected contrast in the finished product.
3. Plan Placement Before Pattern Approval
Piping can be inserted along shoulder seams, side panels, collars, pockets, sleeves, and other garment sections.
However, adding piping to every seam is not always the best choice. Too many raised lines may make a design visually busy or create unnecessary bulk.
Buyers should mark the exact seams that require piping and identify where it should start and stop.
They should also confirm how piping lines meet at intersections, such as where a shoulder seam joins a front panel or where two decorative lines meet near a pocket.
These decisions should be visible in the approved technical drawing.
4. Consider Curves and Corners
Piping is easier to control along a straight seam than around a tight curve or sharp corner.
When piping follows a curved neckline, pocket edge, or shaped panel, the material must bend smoothly without puckering or twisting.
Before bulk production, buyers should inspect:
- Smoothness around curves
- Consistency of the visible piping width
- Alignment at corners
- Neat joins where piping sections meet
- Absence of wrinkles or unwanted twisting
The sample should include the most complicated part of the design. A straight-line sample alone cannot prove that curved sections will look correct.
5. Evaluate Comfort and Seam Bulk
Piping adds material to a seam. Depending on its thickness and location, it can make a garment stiffer or more noticeable against the body.
This is especially important for lightweight sportswear, fitted tops, and garments worn for extended periods.
The manufacturer should assess whether the piping creates excessive thickness at seam intersections or rubs against the wearer.
For garments intended for movement, buyers should try the sample in realistic wearing conditions rather than evaluating it only on a hanger.
6. Check Compatibility With the Main Fabric
The piping material should behave appropriately alongside the garment fabric.
Differences in stretch, shrinkage, thickness, or washing behavior can lead to wavy seams, puckering, or changes in the piping’s shape.
For stretch garments, the piping construction must accommodate the movement required by the design. A rigid trim may not behave well along a highly elastic seam.
Ask the manufacturer to evaluate the piping and body fabric together during sampling, including after the intended care process.
7. Review the Piping Sample
An approved sample should demonstrate the most important piping details.
Buyers should check:
- Whether the visible width is consistent
- Whether the color is correct
- Whether the piping follows the intended seam
- Whether corners and intersections are neat
- Whether the seam feels comfortable
- Whether the piping remains stable after washing
If a design uses piping in several locations, inspect each location rather than assuming one successful seam proves every section is correct.
8. What Should Be Included in the Tech Pack?
A piping specification should include:
- Placement diagram
- Finished visible width
- Material and color
- Cord or flat construction
- Start and end points
- Treatment of corners and intersections
- Stretch or flexibility requirements
- Approved sample reference
Photographs can be especially useful when they identify the front, back, and individual piping locations.
Our Approach to Custom Apparel
For custom apparel, piping should be treated as a planned construction detail rather than an addition made after the garment design is finalized. Defining placement, width, material, and intersection details before production helps reduce revisions and keeps the finished garment consistent with the approved sample.
Conclusion
Piping can improve the visual definition of custom clothing, but its success depends on precise placement, suitable materials, and clean construction.
Before approving a bulk order, buyers should evaluate straight seams, curves, intersections, comfort, and color consistency on a physical sample.